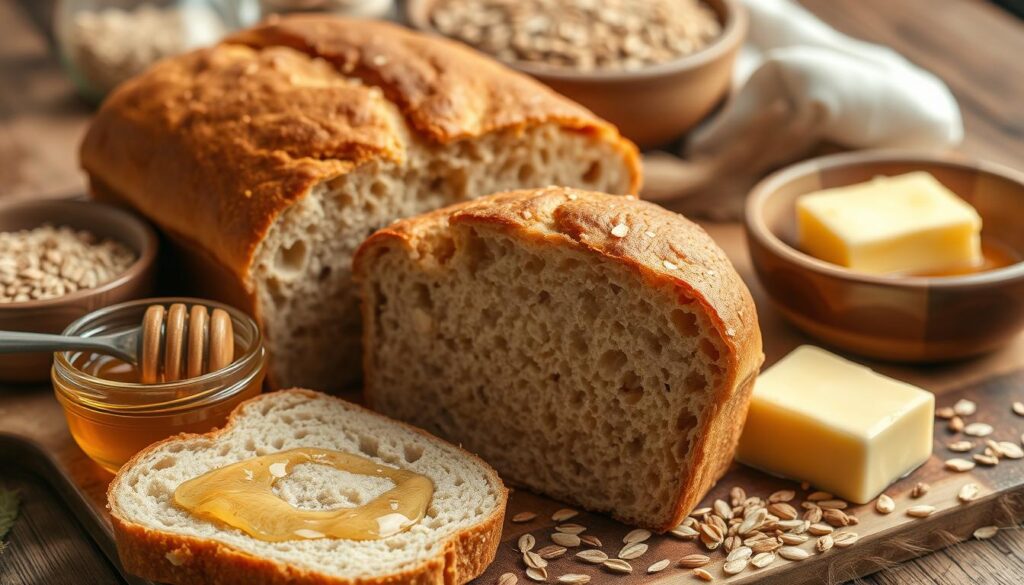
Homemade Honey Wheat Bread Recipe: There’s nothing like the aroma of freshly baked bread wafting through your kitchen. This easy and delicious recipe transforms simple ingredients into a golden, tender loaf that’s perfect for sandwiches, toast, or enjoying with a dollop of butter. Packed with whole wheat goodness and natural honey sweetness, this homemade bread will soon become your go-to favorite.
Creating the perfect honey wheat bread isn’t just about following a recipe – it’s about crafting a moment of pure culinary joy. In just under 3 hours, you’ll transform basic pantry staples into a tender, golden loaf that’s perfect for sandwiches, toast, or simply enjoying with a smear of butter.
Whether you’re a seasoned baker or a kitchen novice, this honey wheat bread recipe is designed to deliver guaranteed success. With simple techniques and readily available ingredients, you’ll create a bread that’s not just delicious, but also packed with nutritional goodness.
Get ready to discover why this homemade bread will become your new favorite kitchen adventure. Your journey to baking the most incredible homemade honey wheat bread starts right here.
Why This Homemade Honey Wheat Bread Recipe Will Become Your Family Favorite

Finding the right honey wheat bread recipe can change your family’s eating habits. This honey wheat bread recipe is a tasty and healthy choice. It will soon become a favorite in your home.
Perfect Balance of Sweetness and Nutrition in Honey Wheat Bread
Is wheat bread with honey healthy? Yes, it is! This bread is full of good stuff. The honey makes it sweet and adds important nutrients. Each slice has about 170 calories and lots of health benefits.
- Rich in whole wheat flour nutrients
- Natural sweetness from pure honey
- Contains 44 essential nutrients
- Low in processed sugars
Time-Tested Honey Wheat Bread Recipe for Guaranteed Success
This honey wheat bread recipe has been perfected over 9 years. It’s not just tasty; it’s also good for you. It’s a reliable choice for any meal.
“A slice of homemade bread is like a warm hug for your taste buds and your health.” – Family Baker
Versatile for Any Meal
Your family will love how versatile this bread is. It’s great for sandwiches, toast, or just on its own. With about 18 slices per loaf, it’s perfect for a big family.
Bake with confidence. You’re making a nutritious, tasty bread that everyone will love!
Essential Ingredients for the Perfect Honey Wheat Bread Recipe
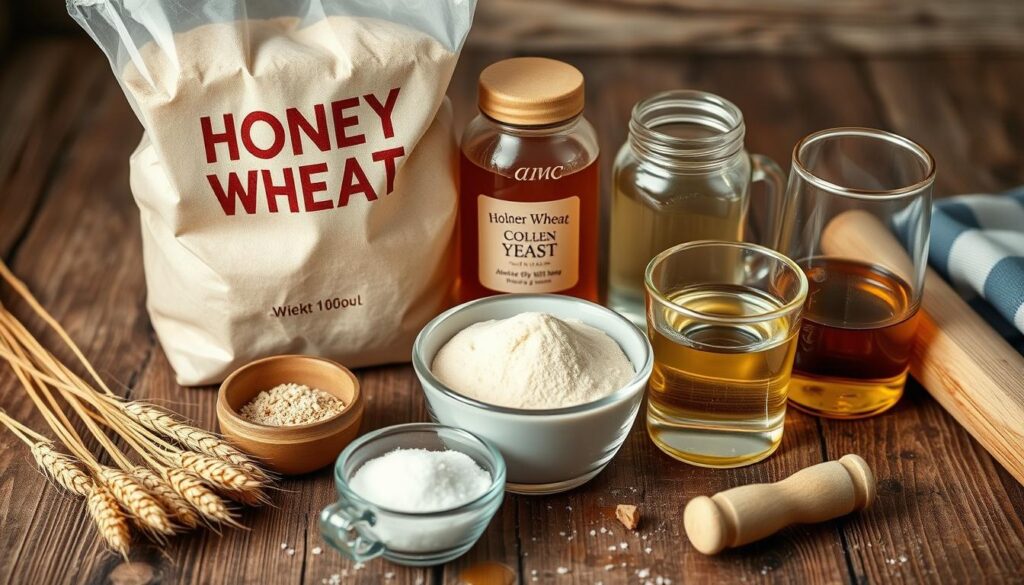
Making a tasty honey wheat bread recipe begins with picking the right ingredients. Honey is key in bread baking. It adds sweetness, helps yeast work, and makes the bread soft and tender.

- Whole Wheat Flour (3 ¼ cups): Gives the bread nutritional value and a hearty texture
- All-Purpose Flour (2 cups): Makes the bread lighter and softer
- Instant Yeast (2 ½ teaspoons): Crucial for the bread to rise
- Salt (1 ½ teaspoons): Boosts flavor and controls yeast
- Honey (¼ cup): A natural sweetener with many benefits
- Vegetable Oil (3 tablespoons): Adds moisture and helps with texture
Choose unbleached, minimally processed flours for better taste and nutrition. Make sure ingredients are at room temperature for best results.
“The secret to great bread lies in understanding how each ingredient works together” – Artisan Baker
Here’s a detailed look at what each ingredient does:
| Ingredient | Primary Function | Baking Impact |
|---|---|---|
| Whole Wheat Flour | Provide structure | Adds nutty flavor, increases fiber |
| Honey | Activate yeast | Enhances browning, adds sweetness |
| Instant Yeast | Cause rising | Helps dough develop volume |
| Vegetable Oil | Create moisture | Prevents dryness, improves texture |
By choosing and mixing these ingredients carefully, you’ll make a delicious honey wheat bread. It’s both healthy and tasty.
Kitchen Tools and Equipment Needed
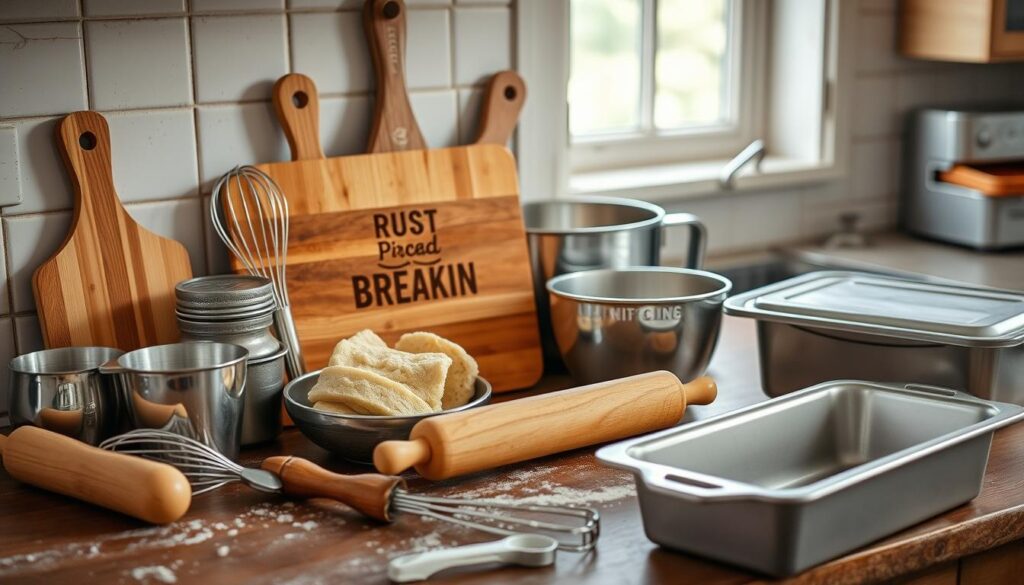
To make delicious honey wheat bread, you need the right tools. Preparing your kitchen with the right equipment is key to baking success. Let’s look at the essential and optional tools for making the perfect loaf.
Essential Baking Tools
Every home baker needs a basic set of tools for making honey wheat bread. Here are the must-haves:
- Large mixing bowl for combining ingredients
- Sturdy wooden or silicone spatula
- Dough scraper for easy handling
- 8×4 inch loaf pan
- Wire cooling rack
Precision Measuring Instruments
Accurate measurements are key in bread making. Here are the tools for consistent results:
- Digital kitchen scale
- Measuring cups (dry and liquid)
- Measuring spoons
Optional but Helpful Equipment

- Stand mixer with dough hook
- Instant-read thermometer
- Bread proofing basket
- Bench scraper
“The right tools can transform your bread baking from good to extraordinary!” – Professional Baker’s Wisdom
| Tool Category | Recommended Items | Price Range |
|---|---|---|
| Mixing | Large bowl, spatula | $10-$30 |
| Measuring | Digital scale, cups, spoons | $20-$50 |
| Baking | Loaf pan, cooling rack | $15-$40 |
Pro tip: Quality tools are an investment in your baking journey. Choose durable, multipurpose equipment that will serve you for years to come.
Step-by-Step Honey Wheat Bread Recipe
Making a honey wheat bread recipe is simpler than you think. This recipe turns your kitchen into a cozy bakery. It fills your home with delicious smells.
First, collect your ingredients. You’ll need:
- 2 cups warm water (100-110°F)
- 1/2 cup honey
- 1/4 cup olive oil
- 1 1/2 tablespoons instant yeast
- 6+ cups whole wheat flour
- 1 1/2 tablespoons salt
- Optional: 1 tablespoon vital wheat gluten
Here’s how to make your honey wheat bread:
- Activate the Yeast: Mix warm water, honey, and yeast. Wait 5-10 minutes for it to get foamy.
- Combine Ingredients: Add oil and salt. Then, mix in flour slowly until a dough forms.
- Knead the Dough: Work the dough for 8-10 minutes. It should be smooth and elastic.
- First Rise: Let the dough rise in a warm spot for about 1 hour.
- Shape Loaves: Split the dough and put it in greased pans.
- Final Rise: Let the loaves rise for 30 minutes.
- Bake: Bake at 350°F for 30-45 minutes until it’s golden.
“The secret to great bread is patience and practice.” – Artisan Baker
Pro tip: Your bread is ready when it hits 190°F inside. Let it cool fully before slicing for the best taste.
Mixing and Kneading Techniques for the Best Honey Wheat Bread
Learning how to knead bread is key to making the perfect honey wheat bread recipe. The way you mix and knead affects the dough’s texture, rise, and quality. This is crucial for a great loaf.
Proper Flour Integration
Start by adding flour slowly to your wet ingredients. This helps avoid lumps and ensures even mixing. Here’s how to do it right:
- Combine dry ingredients first
- Create a well in the flour mixture
- Slowly add liquid ingredients
- Mix until a shaggy dough forms
Kneading Methods
Kneading develops gluten, giving your bread that chewy texture. You can use two main methods:
- Hand Kneading: Work the dough on a floured surface for 10-12 minutes
- Stand Mixer Kneading: Use the dough hook attachment for 5-7 minutes
Dough Consistency Tips
Getting the dough right is an art. Your dough should be:
| Characteristic | Desired Result |
|---|---|
| Texture | Smooth and elastic |
| Stickiness | Slightly tacky but not wet |
| Windowpane Test | Thin, translucent membrane when stretched |
“The secret to great bread is patient kneading and understanding your dough.” – Professional Baker
Pro tip: Let your dough rest for 10 minutes after kneading. This helps the gluten relax, making shaping easier.
Rising and Proofing Guide for Fluffy Honey Wheat Bread
Learning how to proof bread is key to making the best honey wheat bread. The rising stage turns your dough into a light, airy loaf. This will make your taste buds happy.
“The magic of bread making happens during the rising stage” – Artisan Baker’s Wisdom
Knowing how long to let bread rise is important. It affects your baking success. You need to watch the temperature, environment, and timing closely.
Key Proofing Stages
- Bulk Fermentation: Let dough rise until volume increases by 30-40%
- First Rise: Approximately 1-2 hours at 78°F
- Second Rise: 1 hour in baking pan
Optimal Rising Conditions
| Proofing Stage | Temperature | Duration |
|---|---|---|
| Bulk Fermentation | 78°F | 1.5-2 hours |
| Final Proof | 78-80°F | 1 hour |
Pro tip: A warm, draft-free area ensures consistent rising. Your kitchen counter near a gentle heat source works perfectly.
If you’re not ready to bake right away, you can refrigerate the dough after the first rise. This can be for up to a week. This method, called cold fermentation, can make the bread taste even better.
Signs of Perfect Proofing
- Dough doubles in size
- Gentle finger press leaves a small indentation
- Surface looks smooth and slightly puffy
Remember, patience is key in bread proofing. If you rush it, your bread might turn out dense and heavy. It won’t have the beautiful texture you want.
Baking Temperature and Timing for Your Honey Wheat Bread Recipe
Getting your honey wheat bread recipe just right needs careful baking. Knowing the best bread baking temperature is key. It affects the bread’s texture and taste.
Optimal Oven Settings
For top results, heat your oven to 350°F (175°C). This temperature helps the bread bake evenly without burning the crust. Put the bread in the center rack for even heat.
- Preheat oven to 350°F
- Use center rack for even baking
- Avoid temperature fluctuations
Visual Cues for Doneness
Checking if bread is done is more than just timing. Look for these signs:
- Golden-brown exterior color
- Hollow sound when tapped on the bottom
- Internal temperature of 190°F (88°C)
“The perfect bread speaks to all your senses – not just your taste buds.”
Use an instant-read thermometer to check the bread’s internal temperature. If it hits 190°F, it’s fully baked. Let it cool for 1 hour after baking before slicing. This step helps set the bread’s structure.
Pro tip: Cover the bread with aluminum foil after 25 minutes of baking. This prevents over-browning and ensures it cooks well.
Storage Tips and Shelf Life
Knowing how to store homemade bread is key to keeping its taste and texture. Your freshly baked honey wheat bread needs careful storage to stay fresh and tasty.
The shelf life of honey wheat bread depends on several storage factors. At room temperature, your homemade bread can stay fresh for up to 3 days. To keep it fresh, follow these tips:
- Use an airtight container to prevent moisture and air exposure
- Store at room temperature away from direct sunlight
- Keep bread in a cool, dry place
Freezing is a great way to keep your bread fresh longer. Your honey wheat bread can be frozen for up to 3 months. Here’s how to freeze it:
| Storage Method | Duration | Recommended Technique |
|---|---|---|
| Room Temperature | 3-4 days | Airtight container |
| Refrigerator | 5-7 days | Sealed plastic bag |
| Freezer | Up to 3 months | Pre-slice, wrap individually |
“Proper storage is the secret to enjoying homemade bread at its best!” – Artisan Baker’s Wisdom
Pro tip: Slice your bread before freezing. This makes thawing and serving easier. Just toast or warm a slice for that fresh-baked taste.
Remember, homemade honey wheat bread doesn’t have preservatives. So, watch for staleness or mold. Always trust your senses and throw away bread that looks or smells bad.
Variations and Customization Options
Your honey wheat bread recipe is a blank canvas for creativity. With a few tweaks, you can make it your own. It can match your taste and dietary needs perfectly.
Exploring different honey wheat bread variations is fun. You can make your bread truly unique. Here are some ideas to get you started:
- Seed Toppings: Sprinkle sesame, sunflower, or pumpkin seeds on top for added texture and nutrition
- Flour Experiments: Mix different flour types to create unique flavor profiles
- Sweet Alternatives: Substitute honey with maple syrup or agave nectar
- Flavor Boosters: Incorporate herbs, nuts, or dried fruits
“Bread baking is an art of transformation, limited only by your imagination.” – Artisan Baker
If you’re watching your diet, you can still enjoy delicious bread. Try these healthy tweaks:
| Variation | Ingredients to Add | Flavor Profile |
|---|---|---|
| Cinnamon Raisin | ¾ cup raisins, 1 tsp cinnamon | Sweet, Warm Spice |
| Herb Infusion | 2 tbsp rosemary, 1 tbsp thyme | Savory, Aromatic |
| Nutty Delight | ½ cup chopped walnuts | Rich, Earthy |
When you’re customizing your bread, keep the main ingredients in balance. Start with small changes and adjust as needed. Your homemade honey wheat bread can be a masterpiece of culinary art!
Common Troubleshooting Tips for Perfect Results
Bread baking problems can be frustrating, but with the right knowledge, you can overcome most challenges. Understanding how to fix bread issues starts with recognizing common mistakes and learning practical solutions.
Successful bread making requires attention to detail and understanding of key baking principles. Let’s explore some critical troubleshooting strategies to help you create perfect loaves every time.
Texture Challenges in Bread Baking
Texture problems often stem from precise ingredient measurements and technique. Here are key solutions for bread baking problems:
- Prevent dense bread by aerating flour before measuring
- Ensure accurate flour weight (4 1/2 to 5 ounces per cup)
- Avoid overworking dough, which can create tough texture
- Check yeast freshness – discard expired packages
Rising Difficulties
How to fix bread issues related to rising requires understanding yeast behavior:
- Use water temperature between 125-130°F
- Avoid water hotter than 130°F, which kills yeast
- Proof yeast for 15-20 minutes before mixing
- Ensure warm, draft-free environment for rising
Baking Challenges
Master your baking technique with these professional tips:
- Preheat oven for at least 30 minutes to 450°F
- Rotate pan for even browning
- Use an oven thermometer for accuracy
- Allow bread to rest 10 minutes after baking
“Perfect bread is a science and an art – patience and practice make delicious results.”
By understanding these troubleshooting techniques, you’ll transform your bread baking skills and create consistently amazing loaves.
Conclusion
Baking a homemade honey wheat bread recipe offers more than just a tasty meal. It lets you control what goes into your food, save money, and make your kitchen a personal space. This is more than just eating; it’s a way to express yourself.
Why choose homemade honey wheat bread over store-bought? The freshness, taste, and health benefits are unmatched. Each slice is a promise of quality, filled with whole grains and honey’s natural sweetness. This is something commercial breads can’t offer.
As you get better at baking, your home will become a place of joy. You’ll learn to make bread that’s not just good for you but also satisfying. Your family will feel the love in every loaf you make.
Bread making is a journey that gets better with time. Enjoy the learning, the failures, and the successes. Your homemade honey wheat bread will be a testament to your dedication and creativity.
Pair your freshly baked bread with savory dishes, such as this Mexican Chicken Marinade Recipe.


2 thoughts on “Homemade Honey Wheat Bread Recipe – Easy & Delicious”