
Pan-fried chicken thighs are a game-changer for anyone who loves crispy, golden-brown skin with juicy, flavorful meat. This cooking method is quick, simple, and doesn’t require an oven, making it perfect for weeknight dinners. Whether you’re using bone-in or boneless chicken thighs, understanding the right techniques and tips will help you achieve restaurant-quality results at home.
In this comprehensive guide, you’ll learn everything from selecting the best chicken thighs to mastering the perfect pan-frying method. We’ll also cover common mistakes to avoid, serving suggestions, and answers to frequently asked questions.
Looking for another delicious chicken dish? Try our Hot Honey Chicken Recipe for a sweet and spicy kick!
Introduction to Pan Fried Chicken Thighs
Why Pan Frying Chicken Thighs is the Best Method
Pan-frying is one of the best methods for cooking chicken thighs because it locks in moisture while creating a crispy, golden-brown crust. Unlike baking or grilling, pan frying allows for precise heat control, giving you full command over the texture and doneness of your chicken.
Key benefits of pan-frying chicken thighs:
- Quick cooking time – Perfect for busy weeknights.
- Crispy skin – Achieved through high heat and minimal flipping.
- Juicy and flavorful – Cooking in its own rendered fat enhances taste.
- Simple ingredients – No need for complex marinades or brining.
Skin-on vs. Skinless Chicken Thighs: Which One to Choose?
The choice between skin-on and skinless chicken thighs depends on personal preference and cooking goals.
| Type | Pros | Cons |
|---|---|---|
| Skin-on | Crispy texture, richer flavor, retains more moisture | Higher in fat, requires proper cooking to prevent rubbery skin |
| Skinless | Leaner, cooks faster, absorbs marinades better | Less crispy, can dry out more easily |
For the best crispy, golden-brown result, skin-on, bone-in chicken thighs are the top choice. However, if you prefer a leaner meal, skinless thighs work great with marinades.
Bone-in vs. Boneless: What’s the Difference?
Another important factor is whether to use bone-in or boneless chicken thighs.
- Bone-in thighs take a bit longer to cook but are juicier and more flavorful. The bone helps distribute heat evenly, preventing overcooking.
- Boneless thighs cook faster and are easier to eat, making them a great choice for quick meals or stir-fries.
Best choice for pan frying? Bone-in, skin-on thighs – they deliver the crispiest skin and most flavorful meat.
Choosing the Best Chicken Thighs for Pan Frying
Selecting high-quality chicken thighs is key to achieving the best flavor, texture, and crispiness. Whether you’re buying fresh or frozen, organic or conventional, making the right choice will enhance your pan-frying results.
Fresh vs. Frozen Chicken Thighs: What to Use?
Both fresh and frozen chicken thighs can be used for pan frying, but each has its advantages:
| Type | Pros | Cons |
|---|---|---|
| Fresh Chicken Thighs | No thawing required, retains natural texture, easier to season | Shorter shelf life, requires quick use after purchase |
| Frozen Chicken Thighs | Longer storage time, often more affordable, available year-round | Requires thawing, may retain excess moisture if not defrosted properly |
Best choice? Fresh chicken thighs offer better texture and require no extra preparation. However, if using frozen thighs, proper thawing is essential.
Organic, Free-Range, or Conventional: Which is Best?
The quality of chicken thighs varies based on how the chickens are raised.
- Organic chicken – Raised without antibiotics or hormones, fed an all-natural diet. Higher quality but more expensive.
- Free-range chicken – Allowed to roam freely, leading to firmer meat with a deeper flavor.
- Conventional chicken – Most affordable option but may contain more water content due to commercial processing.
If budget allows, organic or free-range chicken thighs are the best choices for superior flavor and texture.
How to Properly Thaw Frozen Chicken Thighs
If using frozen chicken thighs, proper thawing is crucial to prevent excess moisture from interfering with crispiness.
Safe thawing methods:
- Refrigerator (Best Method): Place frozen thighs in the fridge for 24 hours before cooking.
- Cold Water Method: Submerge chicken (sealed in a leak-proof bag) in cold water, changing the water every 30 minutes.
- Avoid Microwave Thawing: This can lead to uneven cooking and a rubbery texture.
Pro Tip: After thawing, pat the chicken dry with paper towels to remove excess moisture before seasoning. This ensures better browning in the pan.
Essential Ingredients for Flavorful Chicken Thighs
Achieving perfectly pan-fried chicken thighs isn’t just about technique—it also depends on using the right ingredients. The right combination of seasonings, fats, and spices will elevate the flavor while ensuring a crispy, golden-brown crust.
The Best Seasonings and Marinades
Chicken thighs are naturally flavorful, but the right seasoning can enhance their taste even more.
Simple Dry Seasoning Blend (For Classic Flavor)
A quick dry rub adds flavor and helps create a crispy crust. Try this mix:
- 1 teaspoon salt
- ½ teaspoon black pepper
- 1 teaspoon garlic powder
- 1 teaspoon onion powder
- ½ teaspoon smoked paprika (for a smoky depth)
- ½ teaspoon cayenne pepper (optional, for heat)
Marinades for Extra Juiciness
Marinating adds moisture and infuses deep flavors into the chicken. Some great options include:
| Marinade Type | Key Ingredients | Best For |
|---|---|---|
| Garlic Herb | Olive oil, minced garlic, thyme, rosemary, lemon juice | Fresh, light flavor |
| Asian-Inspired | Soy sauce, ginger, sesame oil, honey, rice vinegar | Sweet-savory umami |
| Buttermilk | Buttermilk, salt, black pepper, hot sauce | Tender, juicy meat |
Tip: If marinating, let the chicken sit for at least 30 minutes, but ideally 4-12 hours for maximum flavor.
Choosing the Right Cooking Oil or Butter
The type of fat used for pan-frying affects the texture, taste, and crispiness of the chicken thighs.
| Cooking Fat | Smoke Point | Flavor Profile | Best Use |
|---|---|---|---|
| Avocado Oil | 520°F (271°C) | Neutral, healthy | High-heat frying |
| Peanut Oil | 450°F (232°C) | Mildly nutty | Extra crispiness |
| Ghee (Clarified Butter) | 450°F (232°C) | Rich, buttery | Deep golden crust |
| Olive Oil | 410°F (210°C) | Mild, slightly fruity | Medium-heat frying |
| Butter | 350°F (177°C) | Rich, creamy | Low-heat cooking, not ideal for frying |
Best choice? Avocado oil or ghee—both have high smoke points and create a crispy crust without burning.
Adding Herbs and Spices for Extra Flavor
For an extra layer of aroma and taste, consider adding:
- Fresh rosemary or thyme – Toss into the pan for an herby infusion.
- Crushed garlic cloves – Adds a rich, roasted flavor.
- Lemon zest or juice – Balances out the richness with acidity.
Step-by-Step Guide to Perfectly Pan Frying Chicken Thighs
Mastering the pan-frying process ensures that your chicken thighs turn out crispy on the outside and juicy on the inside. Follow these steps for restaurant-quality results every time.
Step 1: Preparing the Chicken Thighs for Cooking
- Pat the chicken dry – Use paper towels to remove excess moisture. This step is crucial for achieving a crispy skin.
- Season generously – Whether using a dry rub or marinade, coat the chicken evenly for maximum flavor.
- Let it rest – If time allows, let the seasoned chicken sit at room temperature for 15–20 minutes before cooking. This helps it cook evenly.
Step 2: The Best Pan and Heat Setting for Even Cooking
Choosing the right pan and heat level makes all the difference:
| Pan Type | Why It’s Ideal? |
|---|---|
| Cast Iron Skillet | Retains and distributes heat evenly, creating a perfect sear. |
| Stainless Steel Pan | Ideal for browning, but requires proper preheating. |
| Nonstick Pan | Works, but doesn’t develop as deep of a crust. |
- Heat Level: Medium to medium-high heat is best.
- Preheat the pan for about 2 minutes before adding the oil to ensure even cooking.
Step 3: How Long to Pan Fry Chicken Thighs for Optimal Juiciness
Cooking times vary based on whether you’re using bone-in or boneless thighs:
| Chicken Type | Cooking Time (Per Side) | Total Cooking Time |
|---|---|---|
| Boneless, skinless thighs | 4-5 minutes | 8-10 minutes |
| Bone-in, skin-on thighs | 6-7 minutes | 12-15 minutes |
Step-by-step frying process:
- Add oil to the pan – About 1-2 tablespoons of high-smoke point oil (like avocado or peanut oil).
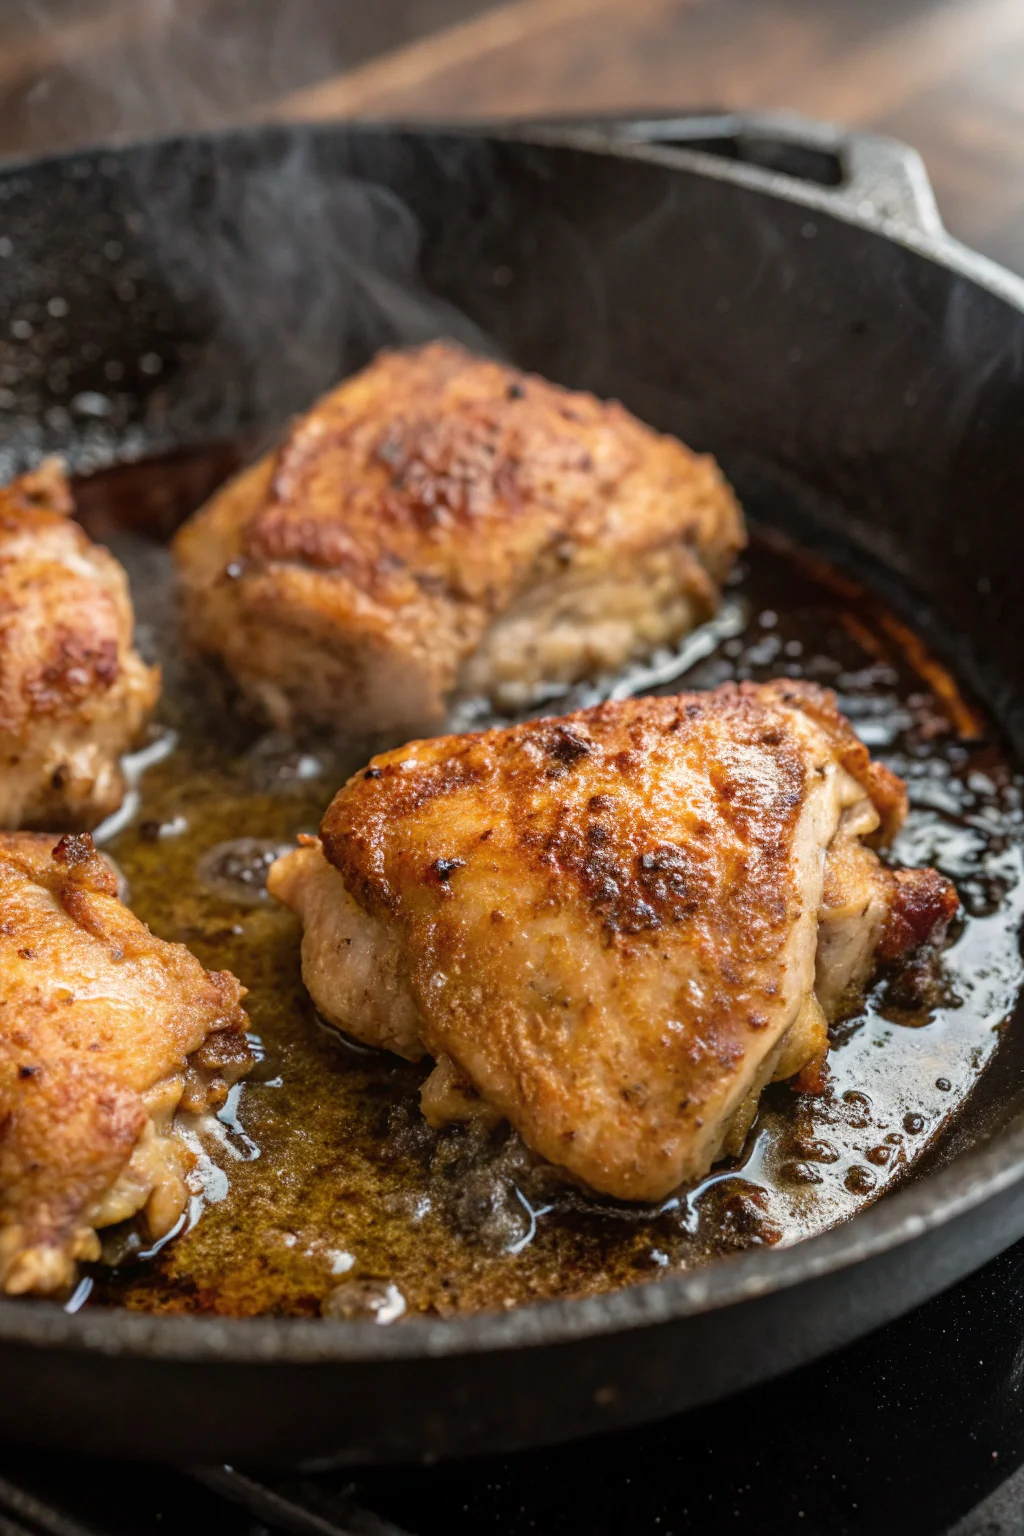
- Place chicken skin-side down – This allows the skin to crisp up properly.
- Cook without moving it for 6-7 minutes (bone-in) or 4-5 minutes (boneless) until the skin is golden brown.
- Flip and reduce heat to medium – Let the other side cook through.
- Check the internal temperature – Use a meat thermometer to ensure the thickest part reaches 165°F (74°C) for boneless and 175°F (79°C) for bone-in.
- Rest before serving – Let the chicken sit for 5 minutes to lock in juices.
Pro Tip: Baste the chicken with butter and fresh herbs in the last 2 minutes for extra flavor.
Tips and Tricks for Crispy, Golden-Brown Chicken
Achieving the perfect crispy crust while keeping the inside juicy requires the right techniques. Follow these expert tips to elevate your pan-fried chicken thighs.
1. The Importance of Drying the Skin Before Cooking
One of the most crucial steps for crispy skin is removing excess moisture:
✅ Pat the chicken dry with paper towels before seasoning.
✅ For extra crispiness, let the chicken sit uncovered in the fridge for 30 minutes before cooking.
✅ Avoid marinating with too much liquid—instead, opt for dry rubs or oil-based marinades.
2. How to Achieve a Perfect Sear Without Burning
A golden, crispy crust requires the right combination of heat and patience:
🔥 Preheat the pan before adding oil—this prevents sticking and promotes even browning.
🔥 Use the right amount of oil—about 1-2 tablespoons to prevent the skin from becoming greasy.
🔥 Don’t move the chicken too soon—let it cook undisturbed for at least 5-7 minutes before flipping.
3. Flipping and Basting Techniques for Maximum Flavor
To ensure even cooking and an extra boost of flavor:
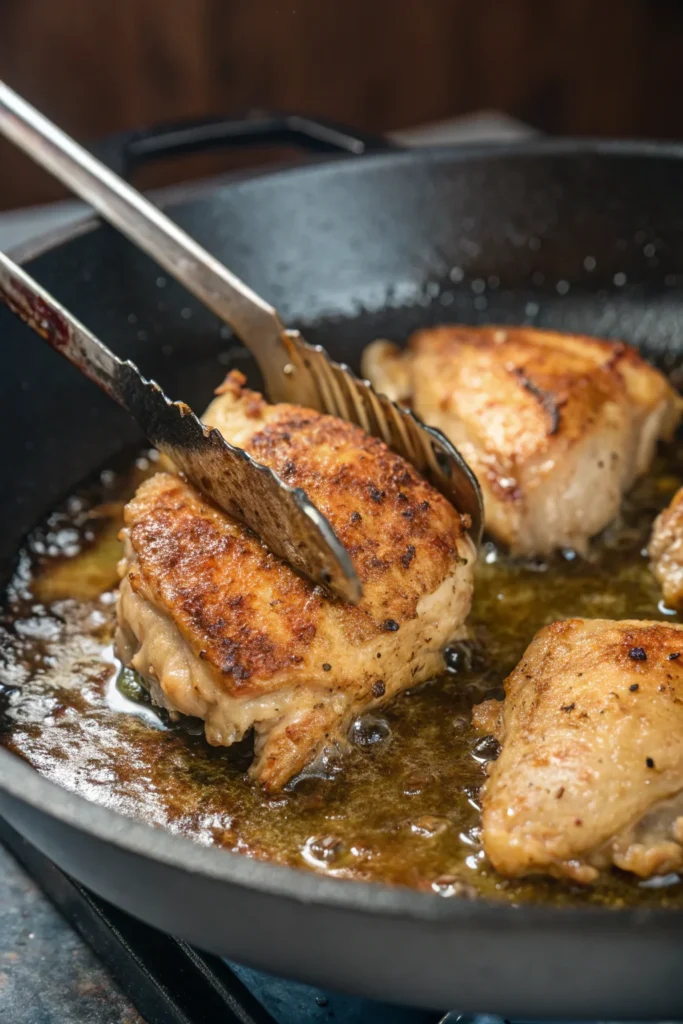
🔄 Flip only once – Moving the chicken too much prevents proper browning.
🧈 Baste with butter or aromatics – Add butter, garlic, and fresh herbs in the last 2 minutes and spoon it over the chicken for richer taste.
🌡 Adjust the heat – If the skin browns too fast but the inside isn’t cooked, lower the heat slightly to finish cooking.
Pro Tip: Press the chicken down gently with a spatula in the first minute to ensure full contact with the pan.
Common Mistakes to Avoid When Pan Frying Chicken Thighs
Even experienced cooks can run into issues when pan-frying chicken thighs. Avoid these common mistakes to ensure crispy, flavorful, and perfectly cooked results every time.
1. Using the Wrong Type of Oil or Butter
Not all fats are suitable for pan frying. Oils with a low smoke point (like butter or extra virgin olive oil) can burn quickly, leading to a bitter taste.
✅ Best oils for pan frying: Avocado oil, peanut oil, or ghee (clarified butter).
❌ Avoid: Regular butter alone—it burns too fast. Instead, add butter at the end for basting.
2. Overcrowding the Pan and Uneven Cooking
If too many chicken thighs are added at once, the temperature of the pan drops, leading to steaming instead of frying. This results in soggy skin instead of a crispy crust.
✅ Leave at least 1 inch of space between pieces.
✅ Cook in batches if needed to maintain the right heat.
3. Not Checking the Internal Temperature
Cooking by time alone can lead to undercooked or overcooked chicken.
✅ Use a meat thermometer to ensure doneness:
- Boneless thighs: 165°F (74°C)
- Bone-in thighs: 175°F (79°C) for extra tenderness
❌ Avoid cutting into the chicken to check doneness, as this releases juices and dries out the meat.
4. Flipping Too Often
Constant flipping prevents proper browning and can cause the skin to stick to the pan.
✅ Let the chicken cook undisturbed for 5-7 minutes before flipping.
❌ Resist the urge to check or move it too soon!
5. Not Letting the Chicken Rest Before Serving
If you cut into the chicken too quickly, all the juices will run out, leaving dry meat.
✅ Rest for at least 5 minutes after cooking to allow the juices to redistribute.
Serving Suggestions & Side Dishes
Pan-fried chicken thighs are incredibly versatile and pair well with a variety of sides. Whether you’re aiming for a hearty, comforting meal or a light and fresh dish, these serving ideas will take your meal to the next level.
1. Best Side Dishes to Pair with Pan Fried Chicken Thighs
A well-balanced meal includes a mix of textures and flavors. Here are some great side dish options:
| Side Dish | Why It Works? |
|---|---|
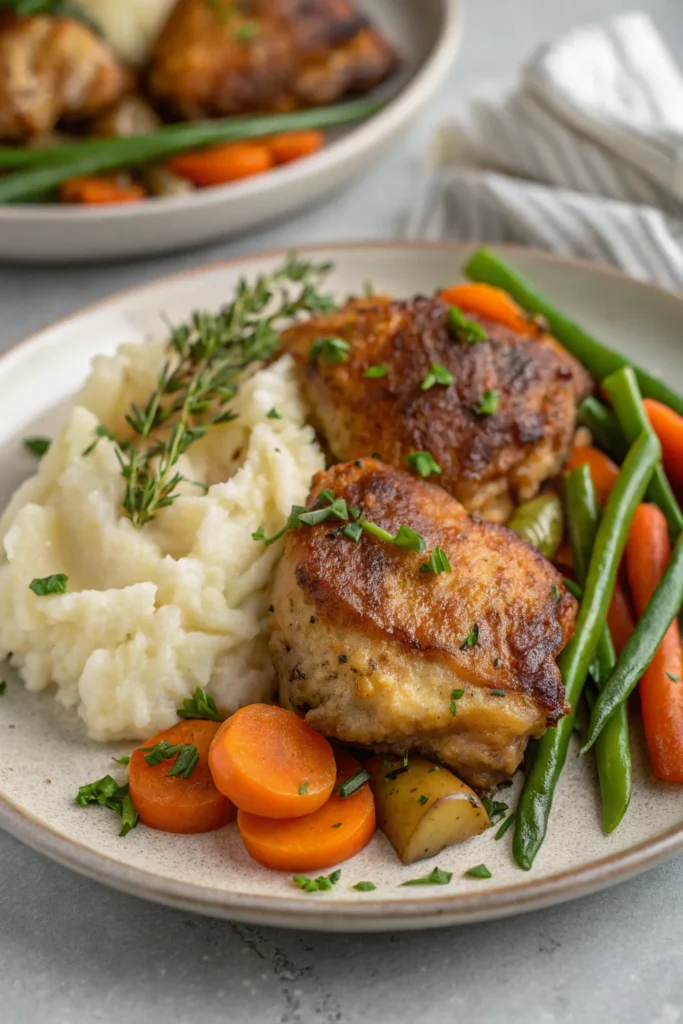
| Garlic Mashed Potatoes | Creamy and buttery, complements the crispy chicken. |
| Roasted Vegetables | Adds a healthy, slightly charred flavor to contrast with the richness. |
| Coleslaw | A fresh, tangy crunch to balance the dish. |
| Crispy Brussels Sprouts | Caramelized and slightly crispy, pairs perfectly with chicken. |
| Rice Pilaf | Light, fluffy, and absorbs the delicious pan juices. |
| Mac & Cheese | A comforting and indulgent option. |
| Cornbread | A slightly sweet, crumbly side that soaks up the flavors. |
Pro Tip: Serve your chicken over a bed of sautéed spinach or arugula for a healthy twist.
Pair your crispy chicken thighs with a comforting side—check out our Grilled Chicken and Rice Recipes for inspiration!
2. Sauces and Dips to Elevate Your Dish
Adding a sauce or dip can enhance the flavor and add a new dimension to your meal:
- Garlic Butter Sauce – A simple mix of melted butter, garlic, and lemon juice.
- Creamy Ranch or Blue Cheese Dressing – A cool contrast to crispy, savory chicken.
- Honey Mustard Sauce – A sweet and tangy option for dipping.
- Spicy Sriracha Mayo – Adds a kick of heat and creaminess.
- BBQ Sauce – Classic smoky-sweet flavors pair beautifully with fried chicken.
3. How to Plate for a Restaurant-Quality Presentation
A beautifully plated dish makes your meal even more enjoyable. Try these plating techniques:
- Layer your sides strategically – Place mashed potatoes or rice underneath the chicken for a stylish stacked presentation.
- Use fresh herbs – Sprinkle chopped parsley or thyme on top for color.
- Drizzle sauce lightly – Instead of drowning the plate, lightly drizzle sauce for an elegant touch.
- Use a warm plate – Warming your plate before serving keeps the food at the perfect temperature.
Storing and Reheating Pan Fried Chicken Thighs
Properly storing and reheating pan-fried chicken thighs ensures they stay crispy and flavorful, rather than soggy or dried out. Follow these best practices for keeping your leftovers delicious.
1. Best Ways to Store Leftover Chicken
If you have leftovers, storing them correctly will help maintain texture and flavor.
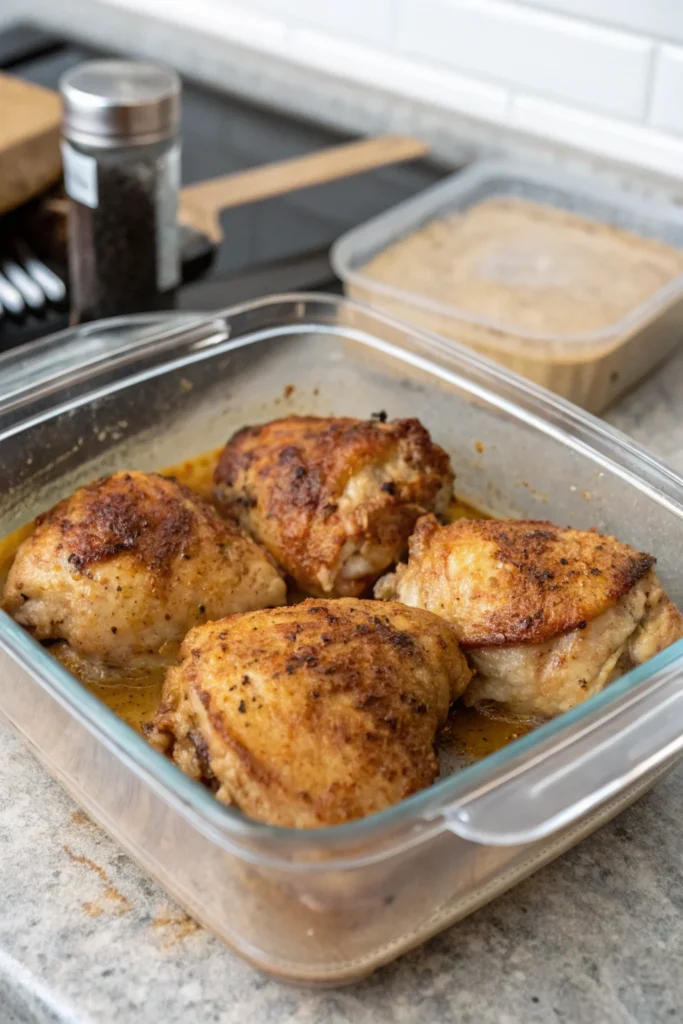
✅ Allow the chicken to cool completely before storing to prevent condensation, which makes the skin soggy.
✅ Store in an airtight container to lock in freshness.
✅ Separate layers with parchment paper if stacking pieces to preserve crispiness.
Storage Timelines:
| Storage Method | How Long It Lasts |
|---|---|
| Refrigerator (Airtight Container) | Up to 4 days |
| Freezer (Wrapped & Sealed Well) | Up to 3 months |
Pro Tip: If freezing, wrap each piece individually in plastic wrap before placing in a freezer bag to prevent freezer burn.
Got leftovers? Learn the best ways to store and reheat with our guide on Healthy Chicken Recipes for Weight Loss.
2. How to Reheat Without Losing Crispiness
Reheating chicken the wrong way can leave it dry or soggy. Here’s how to restore its crispy, juicy texture:
Best Reheating Methods
| Method | Instructions | Best For |
|---|---|---|
| Oven (Best Overall) | Preheat to 375°F (190°C), place chicken on a wire rack over a baking sheet, heat for 10-15 minutes. | Retains crispiness and juiciness. |
| Air Fryer | Heat at 350°F (175°C) for 5-7 minutes. | Quick and crispy results. |
| Stovetop (Skillet Method) | Reheat in a hot pan over medium heat for 4-5 minutes, flipping halfway. | Restores crispiness well. |
| Microwave (Not Recommended) | Heat in 30-second intervals, uncovered. | Can make the chicken rubbery or soggy. |
Pro Tip: If using the oven or air fryer, lightly mist the chicken with a bit of oil before reheating to refresh its crispiness.
3. Can You Freeze Cooked Chicken Thighs?
Yes! Freezing leftover pan-fried chicken is a great way to extend its shelf life. Follow these steps for best results:
- Let the chicken cool completely before freezing.
- Wrap each piece individually in plastic wrap, then place them in a freezer-safe bag or container.
- Label with the date so you know when to use them.
To reheat frozen chicken thighs:
- Thaw overnight in the refrigerator before reheating using one of the methods above.
- If reheating from frozen, use the oven at 350°F (175°C) for 25-30 minutes until heated through.
FAQs on Pan Fried Chicken Thighs
Here are answers to the most common questions about pan-frying chicken thighs to help you perfect your technique.
1. How long do you pan fry chicken thighs?
The cooking time depends on whether the thighs are bone-in or boneless:
| Type | Cooking Time Per Side | Total Time |
|---|---|---|
| Boneless, skinless thighs | 4-5 minutes | 8-10 minutes |
| Bone-in, skin-on thighs | 6-7 minutes | 12-15 minutes |
Always use a meat thermometer to ensure the internal temperature reaches 165°F (74°C) for boneless and 175°F (79°C) for bone-in.
2. What is the best method for cooking chicken thighs?
Pan-frying is one of the best methods because it creates crispy skin and juicy meat in a short amount of time. However, other great cooking methods include:
- Oven roasting – Great for hands-off cooking and crispy skin.
- Air frying – A healthier alternative that still delivers crispiness.
- Grilling – Adds a smoky flavor, ideal for summer cookouts.
For the crispiest skin, pan-frying in a cast iron skillet is the best method.
3. Is it better to pan fry chicken in oil or butter?
It’s best to pan fry chicken in oil first, then finish with butter for extra flavor.
✅ Use high-smoke point oils like avocado oil or peanut oil for frying.
✅ Add butter in the last 2 minutes of cooking for rich, golden-brown flavor.
❌ Avoid frying only in butter—it burns too quickly.
4. Can you pan fry chicken thighs with bones?
Yes! Bone-in, skin-on chicken thighs are actually the best choice for pan frying because they:
- Stay juicier than boneless cuts.
- Develop more flavor as they cook.
- Have crispy, golden-brown skin when cooked properly.
The only downside? Bone-in thighs take a few minutes longer to cook.
5. How long does it take to fry raw chicken thighs?
Raw chicken thighs typically take:
- Boneless: 8-10 minutes total.
- Bone-in: 12-15 minutes total.
Always check the internal temperature with a meat thermometer for food safety.
6. Is 30 minutes long enough to cook chicken thighs?
Yes, 30 minutes is more than enough to fully cook chicken thighs. Pan-frying usually takes 12-15 minutes, while oven roasting may take 25-30 minutes at 400°F (204°C).
For best results, always check the internal temperature rather than relying on time alone.
Master the Art of Pan Fried Chicken Thighs
Pan-fried chicken thighs are an unbeatable combination of crispy skin, juicy meat, and bold flavor. Whether you’re making a quick weeknight dinner or impressing guests, this method guarantees perfect results every time.
By following this guide, you now know:
✅ How to choose the best chicken thighs (bone-in, skin-on for maximum flavor).
✅ The essential seasonings and marinades for the most delicious taste.
✅ The step-by-step cooking method for crispy, golden-brown skin.
✅ The best tips and tricks to avoid common mistakes.
✅ How to store and reheat leftovers without losing crispiness.
Now it’s time to grab your skillet, heat up some oil, and enjoy the best pan-fried chicken thighs ever!